
We interrupt the Oregon 2011 recaps to share the latest craft project. Oh believe me, it's a good one!
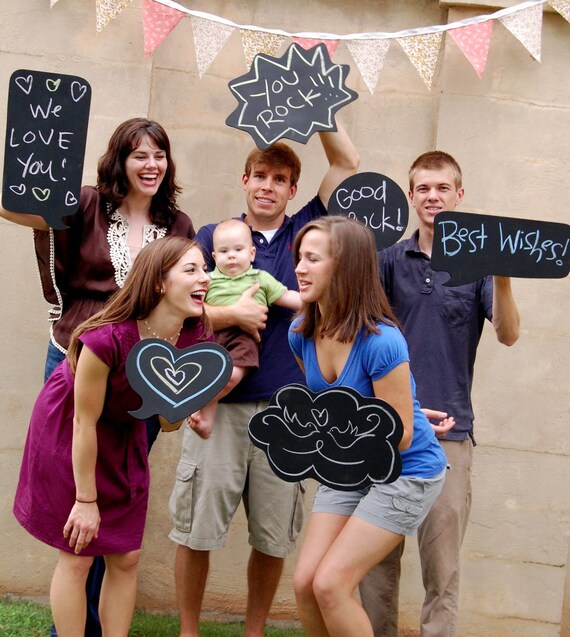
Have you seen these awesome chalkboard speech bubbles? They are the latest rage in photobooth props.
 |
| Playing Grown Up on Etsy |
Well, they may be awesome, but they come with a hefty price tag. Two of the speech bubbles shown in the photo above will run you $52! It is fabricated from wood, so in theory, they are heavy duty and should last quite a long time.
Buuuuuuuuuuuuuuuut, get this, you can make your own for way less! Jordan Ferney's super crafty sister figured out how to make them for a fraction of the cost and not out of wood. For step by step instructions with photos, see Joran's blog post, DIY chalkboard talk bubbles from Oh Happy Day.
 |
| Following the tutorial, I was able to create 6 good sized bubbles |
Here is my materials list:
- 1 roll (18"x6') Chalkboard contact paper - $6.90 ($4.99 s/h)
- 2 Elmers 20"x30" black foam core boards - $7.95 (company screwed up and gave me my money back, but did not refund the shipping charges)
- 1 box of 12 count white chalk - $0.79 (+tax)
- 1 box of 12 count colored chalk - $0.79 (+tax)
- Boning knife (or some other straight edge used to smooth out the contact paper)
- Exacto knife
- Styrofoam sewing spools (free!)
- Gray acrylic paint (leftover from Project Yay)
Cel's Tips:
- Apply contact paper in small sections and use a straight edge to smooth out the contact paper.
- After applying the contact paper to the foam board, allow it to sit over night. I let one board "cure" and did the second one immediately. Both work, but the edges of the contact paper will stay down if you give it more time to adhere.
- Use your exacto knife in small strokes with equal pressure. Go over a cut a 2-4 times. If you try to brute force it, you will end up with jagged edges and little pieces of foam everywhere, plus you get less precision.
- I read this somewhere, treat the surface of your new board by coating it with a layer of chalk dust. I scribbled all over each board, rubbed it in with a dry paper towel, and then wiped each board clean with a damp paper towel.
After completing the bubbles, I patted myself on the back, but realized that I was not done with the project just yet. I needed a handle on the back. I looked through the craft store for ideas. Originally, I thought about just buying prefabricated pieces of wood to use as a handle. But I realized that the wood would be pretty heavy relative to the board. Also, none of the pieces I found were the right size. While browsing for a new crochet needle, it dawned on me that sewing spools were about the size I was looking for, and I had some at home to boot!
Now, I do not sew, but I do have a VAST collection of cross stitch/embroidery thread, some of which is on spools. Long story short, I learned how to cross stitch around the age of 12, maybe as early as 10. While I stopped when I started high school and cross stitching is a granny activity, I cannot bring myself to throw out my supplies.
Some of the spools were styrofoam, which is exactly what I was hoping for. They were old, grungy, and ugly. So after unwinding all the thread from them, I painted them with leftover paint and hot glued them onto the back of the boards. Yay for using my hot glue gun for the first time since 8th grade (another object that I am super glad I did not throw out when I moved to MA).
 |
| Styrofoam sewing spools |
 |
| Painted spool glued to the bag of the speech bubble. |
 |
| Painted spool |
Not too shabby for a grand total: $21.52 and an afternoon of work.
I am in awe of your crafting prowess.
ReplyDelete