Friday, December 31, 2010

8 months

I figure I should probably write the 8 month check-in while we are not only still in the 8th month, but also the same year!

It has been one crazy busy month jam packed with stuff. You thought our summer was busy, wait until you get a load of this:
  • 2 family Christmas parties - I was able to take my camera for a spin and practice my candid portrait photography skills. Posts are in the works.
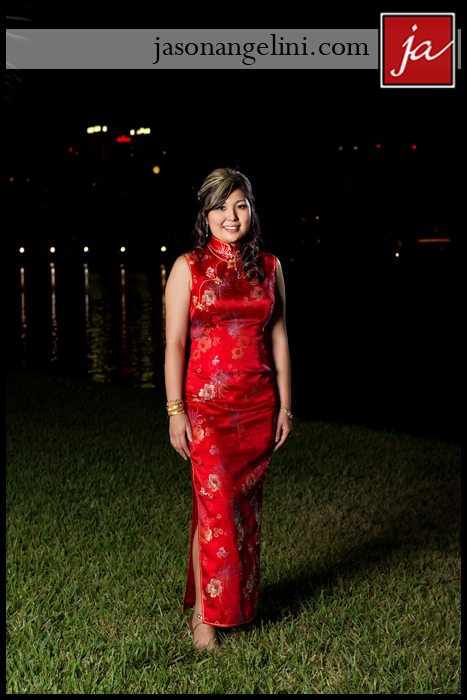
  • My dressmaker, assistant, and broke ground on my Chinese dress.
  • We created a very modest registery in the event that someone insists that we must have one.
  • We started test driving potential caterers! If you thought holiday eating was too much for you, imagine chowing down on gourmet yumminess from not just one, but two companies. Nom nom nom nom nom nom nom nom...
  • We just started looking at DJs - I'm even interviewing one (a very promising one to boot) on Sunday.
  • We picked a hotel to reserve room blocks at, but we're waiting to hear back from the hotel.
  • I finished designing our Save-the-Dates - We hope to get these out in the next couple of weeks, just as soon as we have the hotel information.
  • I'm ALMOST done with the wedding party magazine - Yes, you read that right, I'm "publishing" a magazine for family and the wedding party. I figure that it'll be a cute way to introduce the wedding party members to one another and also give everyone an idea of what we've been doing for the last year. For some reason they all think we have our wedding all planned and ready to go. HA!
Happy New Year everyone!

Countdown:
9 months
11 months

Thursday, December 30, 2010

Food! - East Meets West

Ready? Set. Eat!

The photos aren't as nice, but you get the idea.

Counter-clockwise from top left:
Mini Crab Cake with a dollop of Lemon Aioli
Quail in Toast Cup with a Cranberry Relish
Phyllo purses with Lobster and White Truffle essence

Smoked Chicken, Avocado, and Roasted Red Pepper
Crepes Warm Chevre Crostini topped with thinly sliced Plum and drizzled with a Pomegranate Honey Vinaigrette
Sautéed Foie Gras on Toast Points with a Currant Relish

Baby Spinach and Mache Green Salad With Fresh Mango Slices, Goganzola, Walnuts and Champagne Vinaigrette
 
Peppercorn Encrusted Beef Tenderloin
served with a Sun Dried Tomato and Black Olive Tapenade
finished with a Wild Mushroom and Cabernet Reduction Sauce
Roasted Winter – Locally Grown –Vegetables
Crispy Herbed Risotto Cake With Freshly Grated Parmesan and Fresh Basil

Roasted Boneless Breast of Duck
served with a Sour Cherry & Rosemary Demi-Glaze

Wild Mushroom Raviolitossed In Pesto Oil and Sun dried Tomatoes, Black Olives, Artichoke Hearts, Fresh Mozzarella and Pine Nuts garnished with Shaved Parmesan and Cracked Black Pepper

Roasted Vegetable Napoleonstack of: Portobello Mushroom, Zucchini, Red Onion, And Eggplant
skewered with Fresh Rosemary, Served on a Bed of Chunky Tomato-Basil Vinaigrette

Pear and Champagne Chocolate Truffles
Jeweled Fresh Fruit Tarts
Mini Brownie Cups Filled with Dark Chocolate Mousse
Lemon curd meringue tarts
Heart Shaped Chocolate Dipped Shortbread Cookies

All photos taken by me!

Thursday, December 23, 2010

Food! - Table of Content

We had our first tasting with a potential caterer this week! Ready to go on a virtual dinner tour with us? First up, passed hors d'oeuvres:
Clockwise from top left:
Maple Roasted Scallops and Water Chestnuts Wrapped in Bacon with Warm Maple Dip
Thai Vegetable Spring Roll drizzled with Nuoc Cham Dipping Sauce
Chipotle Barbecued Duck on Grilled Onion Bruschetta with Salsa Crème Fraîche
Alternating Apple and Pear Slices, Blythdale Farms Jersey Blue Cheese Dollop & Spiced Walnut
Almond Chicken Loli Pops With Sage & Grafton Village Vermont Cheddar Accents & Tangerine Drizzle 

Now that your appetite has been teased, we can move onto the first course:
Arugula with Vermont Chèvre and Raspberries (I think the viniagrette was Pomogranate?)

Second course: 

Lemon sorbet intermezzo with candied zest

Now for the main course(s):
Elegantly Carved Herb Roasted Tenderloin
with Slow Roasted Pearl Onion, Red Wine Reduction
Traveling with Crispy Parmesan Potato Sandwich
Petit Spring Vegetables & Frizzled Leeks
 
OR (seriously, the best dish EVER):
Grilled Potato, Leek and Vermont Farmed Goat Cheese Tart with
Marinated Olives aside Petit Spring Vegetables

 Now that you are thoroughly stuffed, how about some dessert?
Petit fours, miniature lemon tarts, and miniature French pastries.

Did ya'll enjoy your meal? We did. We have two more tastings set up with different caterers over the next few weeks. It's going to be a blast!

**All photos taken by me (with my Nikon D7000 and Nikkor 18-105 f/3.5-5.6, an early Christmas present to myself).

Friday, December 17, 2010

Red dress - muslin fitting #1

I had my first fitting, ya'll! I want to share the experience of having a dress custom made to order. Last time, Barbara took the 18 or so measurements to make a muslin. Actually she made two, she made a muslin for the bodice and one for the skirt. 

I apologize for not having any pictures. When I say muslin, it's just a mock up of the dress made with a cotton fabric. There's nothing fancy, it's just to make sure the fit is correct before cutting the real fabric. Here is an example of a muslin top:

Source

Mine basically looked like that with no sleeves and a much tighter neckline. We started by having me put on the bodice. A muslin is traditionally made bigger so that the dressmaker can pin it correctly to one's body. This bodice fit, not quite like a glove, but pretty darn close. Barbara pinned the back closed (that's where the zipper is going to go) and pinned the back darts and the sides seams just a touch. She also had me sit, breath deeply, and move my arms around to make sure it wasn't too tight and still looked right. And here's another cool thing, she had me do the slouch test. Slouch in it and see how it fits.

Next up, I put the skirt on. She made it a full circle skirt and much too long, just so that we could play with it. Just imagine a skirt from teh 50's (without all the poofyness underneath). When the measurements were taken, I was guessing that I wanted the skirt to start at the top of my hips. But after playing around with it some, we decided it would be best to have it start about belly button level. That way my torso was in proportion to my legs. Just so you know, the higher up the waistband, the shorter the torso (but give the illusion of longer legs). And the lower the waistband, the longer the torso, but the shorter you look. We also decided that it would hit just below my knees.

And now for the cool part. Barbara and Charles, her assistant, drew on me, with a pencil! The bodice of my dress looks kind of like a vest, but it is all one piece. To get the right shape and coverage, they drew directly onto the muslin. Armed with a pencil, Charles started putting in where the the collar started and where the modesty panel would go.

I wish I had taken pictures, maybe next time I'll set up my new camera on a tripod to do it's thing.

Generally, there's only one muslin fitting, but due to the complexity of my dress, I'll go back after Christmas for a second.

Thursday, December 9, 2010

then and now

These photos make my heart melt. Seriously, how sweet is this couple?


Found on Young Me and Now Me.


Tuesday, December 7, 2010

Vrrrrmmm, vvrrrrmm

If you haven't caught on, I'm big into DIY and thinking outside the box when it comes to our wedding. So it should be no suprise to you when I say that we are not having traditional ring pillows. We want our ring bearer(s) to have fun with their "jobs".

Kids can sometimes tire and grow out of toys quickly. But our boys love, and I mean LOVE the movie Cars. How cool would it be to have them "drive" these down the aisle?

Etsy seller: DeliciousCrochet

Saturday, December 4, 2010

Registered!

To be honest, we were not planning to register at all. We basically have everything that we need. And if there is anything we ever want, we are the type that just goes out and gets it. But after some debate, we decided to create a modest registry in anticipation of someone saying "but you HAVE to have one."

There is a lot of debate amongst the wedding ettiquette realm. Do you mention the registry? Obviously, one does not mention it in the invitation. Do you preface it by saying that one's presence is present enough? For us, all we want is to celebrate with our family and friends. Believe us when we say that. We've been to enough weddings to know first hand how much time, money, and effort it takes to travel. Don't get us wrong, it is all worth it to be able to share in our friends happiness. But we do we want anything  more.

Jake with the scan gun!


Your table awaits

Oh escort cards, another one of those necessary details for our wedding. What are they? They're tags that inform guests of their table assignment. From the begining, we planned to go the traditional route of using tent cards like so:

via Girl with a Ring

I even have the mock up printed out. The names and table number on the front, and a short note on the inner
flap asking guests to share their photos with us on shared website (to be determined). But today, as we drove back from Crate and Barrel (we started a registry!), I came up with a different idea.

One Chinese wedding tradition is red envelopes which are also called lucky envelopes (or lai see in Cantonese). For major occassions such as the lunar new year, birthdays, and weddings, money is usually given as a gift. Money is never just handed over, but rather given in a red envelope.
I was struck with the desire to incorporate these in our wedding as a cultural element. But we can't just give these out (empty), some might interpret it as "hey, give us money." Buuuuuuuut, what if we use them as part of our escort cards? Like so:

via The Party Girl

The only drawback is that I won't be saving myself anytime, in fact, I'll be creating more work for myself, but I like the added touch. Not following huh? There are two issues with traditional lucky envelopes. 1) They're kind of expensive. 2) I'm not sure how I would print names on the envelopes themselves. My printer may have issues printing on the slick surface. Also, the gold ink traditionally flakes off, I can't risk ruining my printer. I could just use clear address labels, but both of us HATE them.

Are you probably at the edge of your seat wondering how I'm going to get around these obstacles? OK, I'll share. The plan is to use baby envelopes and a double happiness stamp from Paper Source.

Tuesday, November 30, 2010

Saturday, November 27, 2010

Milestone: Red dress!

Whooo! I finally found a dressmaker! It's been a long and arderous journey, but I'm glad its over (almost). My friend Natalie and I actually searched all over the Boston area for a dressmaker. But each time the cons outweighed the pros. One place only took your measurements and sent them to Vietnam where they actually made the dress. Other places did not give you any wiggle room for customization other than fabric. We did find one place in Boston that allowed for customization, but the reviews for that vendor were horrendous. Natalie's mom also had a not so great meeting with the shop owner so that swayed my decision not to use them.

I didn't think my original design would be all that hard to make if one started with a commercial pattner. So on a whim, I started searching Craigslist for seamstress/dressmaker/fashion students looking for work. At first I didn't find anything. I tried again a few weeks later. I told myself that it would be my last attempt. If I didn't find anything, I'd just save my money and not have a second dress. Well, the moons must have been aligned just right, because I found Barbara of Anchorage Nine. She had just moved her business from San Fransisco to Somerville and was trying to spread the word. After a couple of emails back and forth, I knew she was the one for the job.

Now let me share with you the evolution of my Chinese dress. This first picture is of a traditional cheongsam or qi pao. It's characterized by the high mandarin collar, ankle length, red fabric, and very fitted cut:

Jason Angelini Photography

This second photo is what I thought I wanted initially. Keeping the top half traditional, but flaring the skirt out to give me room to breathe and dance:

via ze|ciia's flicker

I wanted more of a v-neck opening so that I wasn’t being choked to death (I'm slightly claustrophobic), but we didn’t know how to make it work with the diagonal closure. Barbara and I tried a couple of ideas, but every idea we had turned out all wonky. Then I found this image online (ignore the skirt, it’s hideous):
 
modern cheongsam design by e-fu shop

I fell in love with this next dress a long time ago. I loved it so much that I found out what pattern was used and my friend bought the pattern to make the dress for me. I was thinking that it could either be my rehearsal dress or reception dress. But life happens, she had her second baby and sewing is on her back burner. Anyways, I loved the skirt and thought it was perfect. It is very "me".


Now combine the skirt with the open neckline design, change the collar, and wah-la: my dress!

My dress!

Barbara took about 18 million measurements (ok, just 18) a couple of weeks ago and will be starting on the muslin. The muslin is the mock up of the dress using a cheap fabric. It should be finished before Christmas.

Tuesday, November 23, 2010

Project YAY!

I brought up the concept of "yay" flags a couple of months back. Well, they have come to fruition much sooner than I thought. I decided to make them for my wedding cohort of Young(s) and in Love; an early wedding present if you will.

In trying to be a good blogger, that or just to document the process so that I can possibly repeat the project, I took pictures along the way.

Step 1: Purchase premade canvas flags from Oriental Trading Co.

Step 2a: Upon receiving flags, remove wooden dowels and iron fabric flat.

Step 2b: Outsource dowel modification to friends with wood working experience. Big thanks the A. and C.! The dowels are sharpened at one end, like a skewer. For safety reasons, I choose to have it filed down.

Step 3: Size and print out design on paper.


Step 4: Trace design onto plastic stencil. Blank stencil plastic was purchased from Michaels.


Step 5: Cut out design with exacto knife.


Step 6: Mess up and repeat steps 2 and 3.


Step 7: Paint! I used acrylic paint and a sponge brush. Tip: I used a damp paper towel to wipe away excess paint between flags; making sure to wipe away paint on the back side of the stencil (the side that touches the fabric) to keep the image from bleeding. Oh and depending on the paint you use, you might want to take breaks for make sure that you have the windows open ;)

Step 8: Let dry.


Step 9: Dip end of dowel in glue (Elmer's is fine), you just need a dab. Insert dowel into flag and let dry.

Step 10: Say "YAY" and wave them around!


Monday, November 22, 2010

1, 2, 3...

Spend enough time on wedding blogs and you'll start seeing trends like this (over and over):


via Ruffled
via Gator Bride

Those are cheap dual sided Tolsby photo frames from Ikea  that are the latest rage for numbering tables. Perfect, display a photo on one side and the table number on the other. Only I have beef with them. They ONLYcome in a 4x6's. They don't make them as 6x4's. You don't follow? Well, let's say that I want to display photos using those frames. All my pictures would have to be in same shape. I wouldn't be able to do this:

via Mrs. Hot Wings on Weddingbee

I could copy Mrs. Hot Wings, but I don't want to. I don't want to have my photos exposed to the elements. Who know's what will happen to them after people throw back a couple of drinks. Even then, food can accidentally get on them, you know. I would want to protect my pictures!

Luckily for me, Ikea has other options. Plastic or Wood. I could go with Nyttja frames or the tried and true Ribba frames (which I already own). The Nyttja frames are plastic with a sheet of plastic. If I go with the smaller one's, 4x6, they're only $0.50 more than the Tolsby's and I can definitely reuse them in our home. But my idea was to have a little bit of matting around the picture so that I had room to place the table number. Definitely doable, but I would need to go up a size and buy/make the matting. Ribba frames are wood with sheet of glass and come pre-matted. The down side is that they're a bit more spendy, 3x the Tolsby for the 5x7's. I also can't seem to find the 4x6 frames online, but I swear that I have one at home. Guess I need to make a trip down to Ikea.

Yay for another project designed and logistics [almost] figured out. And now you know how I overthink the littlest details.

Nyttja

Ribba


Sunday, November 21, 2010

9 months

Holy crap-a-moley. I know, I know, I say that every month as we count down, but wowzas, time is trucking along.

I am happy to report that we moving on things [slowly]. I almost feel like we're taking care of the little things first, rather than the big ticket items first. What can I say, we're unconventional and like to do things on our own pace.
  • We had our engagement photos taken
  • I have my wedding gown - I have it in my closet!!!
  • I contracted a dressmaker to create my Chinese wedding dress, more on this later
  • We semi-finalized our guest list - yea, most people say to start with this first, maybe we should have...
  • We are starting to look at caterers!  
Countdown:
11 months

Friday, November 19, 2010

Pirate golf, gators, and sunset!

The time before last, I briefly mentioned our adventures in getting to our photo shoot. Of course I went on and on about how worried I was that our pictures wouldn't come out. I've stopped fretting, partially because there's nothing I can do about it at this point, partially because Jake said that we could go back to Florida and redo our pictures if they didn't come out, but mostly because our pictures are READY!!!!!

*click-thump-clack* That was the sound of my jaw hitting the keyboard when I saw our pictures for the first time!!!! It was then followed by a string of OMGs, many Wows, and a couple of Holy craps. They didn't just make me smile, I was grinning from ear to ear and all sorts of giggly.

The photos are AMAZING, WONDERFUL, and PERFECT. They're exactly what we were going for: fun, candid, modern, and artistic.

Want to see what our friends are saying about them?

Love from Facebook. I just happened to have a screen
capture so that I could share the love with our photog.

One week turn around time, can you believe that? Jason's wife, Lucia, is amaze-balls! Not only did she have all of our photos lightly edited, posted for viewing, she also had a really cute (and long) blog post ready for us. Seriously, it can't get any better. Oh well, it can, just look at the photos! I can't stop sharing these. I also can't stop grinning. I also can't stop looking at them. 

OK, enough suspense. Go here for the blog post: Celia and Jakes Engagement Session.

If you want to see the entire album, just let Jake or myself know.

Jason Angelini Photography
Jason is amazing and a blast to work with, it felt more like we were all just hanging out.
I think the two of them are magicians who's medium is photos!

Tuesday, November 16, 2010

Changes

How do you like the new and improved look of the blog?

I thought the colors I previously had up were a little dark. We're not shooting for a gothic look or feel. I also noticed that the font was a touch hard to read on each of the post titles. Hopefully this cleans things up, brightens it with just a touch of color here and there. Although, it's feeling a bit sterile now.

I'll have a new title once we get picture back from our engagement session; they're saying sometime this week!

Friday, November 12, 2010

Florida: sweet surprise

*This is a dual post between this blog and my other blog.

Our photographer and his family are pretty amazing. I can't tell you how many questions and favors I've asked them over the last year. I'm amazed that they've put up with me, and we're still 9 months away from the wedding. Woah, 9 months! Crap!

Anyways, I wanted to thank them. What better way than a tasty treat? How about a tasty treat in the form of their logo?


Our photographer is Jason Angelini. Look them up, they're AWESOME!

These traveled well. I made them the night before we left to keep them as fresh as possible. Placed them in tupperware to keep them moist (at least that was the hope), frozen them, packed them in ice in a cardboard box, and then placed it in the fridge as soon as we got to FL. I was really worried about the heat and humidity, but as it turned out, Florida was experiencing record low temperatures.

Tuesday, November 9, 2010

Florida: Teaser

We're back! Well, kinda sorta. We're back to blogging, but we're blogging from Florida, see....


personal photo


Don't worry, there's construction directly below us too offset the awesome views:

OK, maybe a better word would be demolition. There were walls when we first got here. (personal photo)

So we met with our photographer, Jason of Jason Angelini and rocked our engagement session at a mini golf course, the beach, AND in the middle of a street. But I tossed and turned all night because now I'm worried that our pictures won't come out or that we won't have enough good one's to use as our table numbers. Was the lighting OK? Did we stand still enough for the street shots? I know, I know, I'm sure they're fine and I'm more than positive that he did a fantastic job (as always). But you see, we were 30 minutes late for a session. 30 minutes late before sunset is like racing against time. Why were we late? First we misjudged commuting times. The speed limit is somewhere between 25-35 mph here, we got stuck behind someone that went 25 for most of the stretch, so that was 5 minutes. Then it turns out that we went to the WRONG mini golf place. Stood around for 10 minutes before realizing it was the wrong place. Apparently there are two by the same name on the same stretch of road, 10 minutes apart. *Sigh* What's done is done, all we can do is wait for the final product.

Jason at work...I asked for an awesome shoe shot! (personal photo).

On a positive note, the wind cooperated with us! The 12 mph winds from Sunday died down to just a breeze.

I'll leave you with this teaser, because it's all that I have. Jason started our session off with the Fuji Instax camera! I was so excited that I was tonge tied. I've seen this everywhere in the wedding blogosphere.

Fuji Instax via Uncrate
Originals by Jason Angelini, photo of originals by me.

Wednesday, November 3, 2010

Wedding Train: Stop #8

Victoria and George
October 3, 2010
Colgate Divinity
Rochester, NY

Look closely at the picture in the right. What do you see?
Yes, that's a swing, look closer. The squirrel is swinging!

What a beautiful campus the Colgate  University! This trip was full of many firsts for me: first time riding in a limo (yep, that was the shuttle service to and from the wedding), first time in Rochester, and my first time eating pumpkin bread french toast (OMG, yum). This was also the first wedding we've attended all year in which the ceremony took place in a church.

You probably noticed that there aren't any picture of the bride and groom in the collage above. That's because I caught them on video. It was a bittersweet moment for all of us. Tropical storm Nicole ran its way up the NorthEast the day before the wedding. As you can imagine, this wrecked havoc on travel, specifically air travel. We were able to catch our flight from Boston to Rochester after some delay. However, our friends in Denver were not as lucky. There was no way for them to make it to Rochester until after the ceremony. Those of us at the wedding banded together and did our best to document the festivities for them. With my handy dandy point and shoot camera, I tried to capture what I could of the day.

Ceremony entrance (click here for the HD version):


Other vids from the day:
Ceremony: Sermon and Vows
Ceremony exit
Reception entrance, first dance, and speech
Father/Daughter and Mother/Son dances
Cake feeding


Aboard! Next [virtual] stop: Virginia and Indonesia; a shout-out to the weddings we missed.

Previously:
Wedding Train: Stop #1
Wedding Train: Stop #2
Wedding Train: Stop #3
Wedding Train: Stop #4
Wedding Train: Stop #5
Wedding Train: Stop #6
Wedding Train: Stop #7

Monday, October 18, 2010

going m.i.a.

Hi everyone (I think there's like 3 of you, maybe 5 on a good day).

I just wanted to give you a quick heads up that blog posts will be scarce or none for the next couple of weeks. It's not that I don't have anything to share with you (believe me, there is plenty), I'm just not going to have time to blog from work or after work. I'm pretty sure that after hours, I'll either be doing more work or so exhausted that I'm just a breathing heap on the couch.

Until things calm down, I bid you adieu.

Yes, the backdrop is fake. This was taken with a green screen
at the top of the Space Needle. Note to self: wear makeup.

Tuesday, October 12, 2010

diy inspiration found

How cute are these?!

Mini 'laundry' calendar by c(oi)n: purse, aka. Mrs Green Tea.

I just spent the last hour making a template for 2012 thinking they'd be a great addition to our OOT packages. But now I'm thinking 'laundry' doesn't match with our theme. I'll see if I can come up with something like a magnet to hide the hook.